Showing posts with label EAT3D. Show all posts

Saturday, February 13, 2010

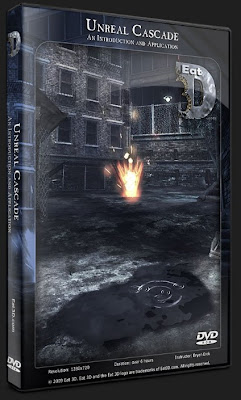
T0901 - Eat3D - Unreal Cascade - An Introduction


In this demonstration the instructor starts off by going over the entire cascade interface and then through most of the common modules. Once the foundation is laid its on to creating several effects from scratch. Everything from creating an explosion, hit effects, water drips, laser beams, and trails are covered.


If you have never used cascade you should be able to follow along and understand. Even if you are experienced using cascade, you should pick up useful information throughout the DVD.

Chapter 1 General Interface Overview
Chapter 2 Overview of Cascade Modules Part 1
Chapter 3 Overview of Cascade Modules Part 2
Chapter 4 Creating and Modifying Trails
Chapter 5 Creating and Modifying Beams
Chapter 6A Creating a Water Drip Effect Part 1
Chapter 6B Creating a Water Drip Effect Part 2
Chapter 7A Creating a Hit Impact Part 1
Chapter 7B Creating a Hit Impact Part 2
Chapter 8A Creating an Explosion Part 1
Chapter 8B Creating an Explosion Part 2

Apps Used: Unreal Editor 3 (from Unreal Tournament 3). Make sure to get the latest update patch

T0900- Eat3D – Unreal VFX – Material Transitions


In this demonstration the instructor starts off by explaining the nodes that will be used throughout the rest of the DVD. From there he goes into depth on how to create a material that can transition from one set of textures and parameters, into another. He also gets into how to make a character completely dissolve away.


Once the materials are setup, the instructor goes into how to control them in Cascade, Kismet, and Matinee. While inside Matinee, you learn how to time the dissolve to match the animation, and also how to swap entire materials and allow the character to dissolve after he has transformed from stone to real life.


* Introduction to the Unreal Editor 3 Material Editor
* Creating Dissolve and Transition Materials
* Controlling the Transition and Dissolve Material with Cascade
* Using Kismet and Matinee to Control the Material Effects
* Creating the full effect of controlling a Transition Material to a Dissolve Material on an Animated Character


Programs Used: Unreal Editor 3 (from Unreal Tournament 3)

Sunday, December 27, 2009

T0876 - Eat 3D 3dsmax101 2009


In this demonstration the instructor dives into the wonderful world of computer graphics by walking the viewer through the many fundamental concepts and techniques necessary to create a successful project. He starts off with an around the world tour of the 3ds Max interface stopping at key areas to discuss proper viewport navigation, selecting objects, moving objects around your scene and combining basic shapes to flesh out an idea.

Once the foundation is in place, the instructor takes the viewer through a wide range of techniques for modeling, texturing, lighting, and animating their creations to complete a city scene. The pros and cons of each method are discussed in detail and the viewer is given the context necessary to take the core techniques and apply them successfully to whatever their end goal or respective industry may be.

BONUS: Over an hour of extra training that goes over new features in 3ds Max 2010. The instructor goes over such featues as containers, scene explorer, ui, viewports, and more. This Bonus content is a downloadable update only and will not be part of the physical DVD.

This DVD has over 21 hours of training and can be considered the ultimate guide for those new to 3ds Max or those wanting to round out their skill set for any market.

* Project Planning and Organization
* Getting Around in 3ds Max: UI, Viewport Navigation, Selections, Transforms and Alignment
* In Depth Look at Polygon Modeling Techniques to Create a Variety of Objects
* Quick Modeling Examples Using Box Modeling, Booleans, Lofting, Spline Modeling, and even Cloth Simulations.
* Modeling Objects from Reference and What Makes Good Reference
* Creating Convincing Metal/Water/Glass/etc. using Standard Materials or Mental Ray Shaders
* Adding Believability Through Proper Use of Textures and Precisely Placing Them on Your Objects
* Various Lighting Techniques are Explored Including Painting with Light and Daylight Systems.
* Basic Rigging and Animating of a Falcon
* Procedural Animation Including Path Constraints, Noise Controllers, and LookAt Operators
* Introduction to Particle Systems including Max’s powerful Particle Flow system.
* Brief Description of Dynamic Hair and Styling
* Scene Optimization and Organization Through Use of Proxy Objects and XRefs
* And much more…

Saturday, May 23, 2009

T0524 - Eat 3D Autodesk 3DS Max 101 DVD


In this demonstration the instructor dives into the wonderful world of computer graphics by walking the viewer through the many fundamental concepts and techniques necessary to create a successful project. He starts off with an around the world tour of the 3D Studio Max interface stopping at key areas to discuss proper viewport navigation, selecting objects, moving objects around your scene and combining basic shapes to flesh out an idea. Once the foundation is in place, the instructor takes the viewer through a wide range of techniques for modeling, texturing, lighting, and animating their creations to complete a city scene. The pros and cons of each method are discussed in detail and the viewer is given the context necessary to take the core techniques and apply them successfully to whatever their end goal or respective industry may be.

This DVD has over 20 hours of training and can be considered the ultimate guide for those new to 3D Studio Max or those wanting to round out their skill set for any market.

* Project Planning and Organization
* Getting Around in 3D Studio Max: UI, Viewport Navigation, Selections, Transforms and Alignment
* In Depth Look at Polygon Modeling Techniques to Create a Variety of Objects
* Quick Modeling Examples Using Box Modeling, Booleans, Lofting, Spline Modeling, and even Cloth Simulations.
* Modeling Objects from Reference and What Makes Good Reference
* Creating Convincing Metal/Water/Glass/etc. using Standard Materials or Mental Ray Shaders
* Adding Believability Through Proper Use of Textures and Precisely Placing Them on Your Objects
* Various Lighting Techniques are Explored Including Painting with Light and Daylight Systems.
* Basic Rigging and Animating of a Falcon
* Procedural Animation Including Path Constraints, Noise Controllers, and LookAt Operators
* Introduction to Particle Systems including Max's powerful Particle Flow system.
* Brief Description of Dynamic Hair and Styling
* Scene Optimization and Organization Through Use of Proxy Objects and XRefs
* And much more…

Programs Used: Autodesk 3dsmax 2009, Photoshop
Duration: over 20 Hours
Instructor: Eric Maslowski

Sunday, February 15, 2009

T0413 - Eat3D Next-Gen Facial Rigging


In this training video the instructor takes you through the entire process of creating a fully bone based facial rig which is transferable to next-gen game engines like Unreal Editor 3.
This video focuses on facial bone rigging and animation. Most game engines do not support blend shapes so it is imperative to know how to create a solid facial rig with just using bones. With the right rig and setup, it is possible to create stunning facial animations in very short amounts of time. If you are a student this video is great to become exposed to professional techniques in the game industry.

* Learn proper joint placement for facial rigging and how to incorporate the mesh into your game's common skeleton
* Learn proper modeling disciplines for animation
* Learn to get around the bugs in Maya's weighting tools and learn proper smooth skin weighting techniques
* Learn how to create proper facial expression
* Learn how to do Lip Sync in a short period of time using simple 2 frame key technique
* Learn to create scripts for quick phoneme keying
* Learn how to create your own Facial Control Interface using simple curves and shape limitations

Programs Used: Autodesk Maya 8.5
Duration: over 5 Hours
Instructor: Matt Skonicki

Friday, January 16, 2009

T0337 - 3D Palace - Next Generation Game Development - For 3dsmax (4 DVD)


The ED209 Game Development Project is a video learning set from www.3d-palace.com that covers advanced game development character building, preperation and insertion into a game both as a static textured mesh and as a fully animated and realised asset. The set covers some unique concepts in game development model development, including a new Scaffold Methodology to allow a much faster approach to modelling.

You will start this set, as usual, with a completely empty scene in 3ds Max, no photoshop files and no game assets - by the end of this mammoth FOUR DVD set, you will have a fully rigged low polygon ED209 with high polygon normal map, actually inside the Unreal Tournament 3 game with every step of the process along the way demonstrated!

WHO ARE THE TUTORS?

Cris Robson - Industry respected mechanical 3d specialist and founder of www.3d-palace.com
Greg Dowding - Leader of the Games Masters Degree Programme at Staffs University

FAQ

q. Is the tutorial end to end? Does it show everything or are there going to be massive cuts, sudden prefabs and so on?
a. The entire modelling process is end to end, as is unwrapping. Normal mapping has been broken down to only demonstrate the process on three seperate areas as the process is repetative and would drive the cost of the set up for an extra DVD. Optimization is demonstrated in full however for the same reasons as with the normal mapping it is demonstrated not on the entire ED209.

q. Are there any timelapses?
a. Yep however theres only one and it is an accompaniment not replacement for the entire unwrapping segment - this means you can if you want watch and learn from the unwrapping 11 hour marathon in real time, or you can watch a 1 hour sped up version if you choose. Both are on the DVDs.

q. Is postage free?
a. Yes

TABLE OF CONTENTS

DVD 1
Scaffold Mesh Building - creating a surrounding approximation mesh that allows us to make sure that everything is going to be built to scale and the right shape and that all the major shapes of the model will lie correctly whilst also allowing us to ascertain what the basic shapes that make the piece are.
Foot
Lower Leg
Upper Leg
Upper Body 1
upper Body 2
Weapon Arm
Finishing the low poly scaffold
High Polygon Mesh Building - This will be used to create normal maps as well as being used for optimizing into the low polygon model and for any beauty passes - high poly renders and so on.
The front toe
The side toes
The Rear Toe and Piston
The Lower Leg One
The Lower Leg Two
The Lower Leg Three
The Lower Leg Four
The Reverse Knee
The Upper Knee
Upper Legs
The Hips
Starting The Torso
DVD 2

More High Polygon Mesh Building
Torso Part 1
Torso Part 2
Torso Part 3
Torso Part 4
Torso Part 5
Torso Part 6
Torso Part 7
Torso Part 8
The Shoulder
The Upper Arm
The Elbow
The Gun System
Appendixes
Assignment of base materials
Creating carbon fiber for the visor
Metalwork
Epilogue and Rendering
DVD 3
Optimization Overview - explaining the principles and demonstrating practice of optimization of the ED209 model to make the high polygon version Game Suitable.
Unwrapping Game Low Poly ED209
Timelapse Version (1 hour)
Full versions follow;
Unwrapping Toes
unwrapping The Foot
unwrapping lower leg
unwrapping knee
unwrapping back knee
unwrapping upper leg
unwrapping upper leg two
unwrapping the hips
unwrapping the torso
unwrapping arm one
unwrapping arm two
unwrapping gun
Duplication of limbs for mapping (Unreal 3 allows us to share UVMaps between duplicated limbs, meaning that we only need to make for example one front toe, map and duplicate to the other leg.)
Normal Mapping (The application of mapping the details of the high polygon ED209 to the Low polygone one using dot3 matting via the texture bake and projection)
Normal Mapping the Front Toe
Normal Mapping the Side Toes
Normal Mapping the Arms
DVD 4
Static Mesh into UT3
Creating unified textures in rough to apply to the low polygon ED209
Importing ED209 as a static asset with materials into the UT3 Engine
Rigging - a complex process due to that inverse knee.
Rigging ED209 - pivots and Links
Rigging ED209 - HD and HI Rigging with IK and FK
Animated assets in UT3
Creating a walk cycle in max for export
Creating PSK and PSA Files
Importing PSK, PSA and Textures
Putting ED209 into a level with Dynamic Lights
Unreal 3 - Matinee, Actors and Kismet
Ed209's conveyor - the new walk
Ed209's conveyor - the new matinee part
Additional content on DVD 4

All Max Files
All wip files
All UT3 assets
All texture files and PSDs
A selection of specially made ED209 reference images
High res ED209 renders
Tuesday, January 6, 2009

T0318 - Eat3D - Old Pillar


What you get:
project files include:
- 1 max file with the final highpoly and lowpoly
- 1 Mudbox file with the final sculpt
- 3 .obj files; for the final low poly mesh,the high poly mesh, and the Mudbox file (useful for other 3d programs)
- 3 2048 PSDs: diffuse-spec-normal
- 2 512 PSDs: channel texture that has the mask and spec tile, and a normal map tile
- 1 unreal upk with the completed asset
- 1 unreal map file with it placed in the scene.
Download Filesize: 1.1 GB
Section 1: Creating the High Poly Meshes
In this demonstration we go through all the steps to get a complete high res model starting from scratch. Starting from a basic box, we go into preparing geometry to take into Mudbox, Sculpting, and then back out into 3dsmax for final touch-ups...
This section includes:
- Blocking out the Basic Forms
- Preparing the Meshes for Mudbox
- Sculpting the Pillar Concrete in Mudbox
- Creating High res rebar and pipes in 3dsmax
- Final Detail Sculpting on all pieces
Duration: 1 hour 20 Minutes
Section 2: Creating the Low Poly Meshes
In this demonstration we go through creating a lowres mesh from a highres mesh. After that we go through both organic and mechanical UV mapping techniques. Then we go through generating the normal maps and other maps we will need for texturing.
This section includes:
- Reusing the high res models to make the low res
- Using PolyCruncher to get a low res Pillar from the Mudbox model
- Pelt Mapping the Pillar and using the relax tool
- Laying out the UVs in a logical order
- Using Render to Texture to get Normal, Diffuse, Ambient Occlusion, and Height maps
- Applying a Metal Bump shader to get an idea of how it will look in game
Duration: 1 hour
Section 3: Texturing and Shaders
In this demonstration we go through creating the texture maps we will use in game. Once the textures are at a good state, we take it all into Unreal and see how it looks. Once the texturing is complete we create a shader in Unreal that can tint the color of the paint, and we also give the Pillar some detail maps. The last thing we cover is placing the Pillar in a simple scene and adding lights and material variations.
This section includes:
- Using our baked maps to start texturing
- Creating a Diffuse, Normal, and Specular map
- Testing the progress in Unreal Editor 3
- Creating a Channel Texture
- Creating a shader to be able to tint the paint
- Adding detail maps to improve the quality
- Placing the models in a scene and adding lights
Duration: 1 hour

Monday, December 29, 2008

T0229 - EAT3D - Live Action & CG


In this demonstration the instructor starts off by explaining the shot and then tracking the footage using Boujou. Once the live footage is tracked, its on to Maya to start blocking out the scene and incorporating CG elements. Everything from Ambient Occlusion, to Render Layers, to even Image Based Lighting is explained while in Maya. After all of the elements are rendered out of Maya, the last thing done is composing them together using Combustion and After Effects. This tutorial is perfect for those who want a solid foundation on how to take your 3D models and incorporate them seamlessly into Live Action video.